If you’re craving authentic hot dog chili sauce, you’re in the right place! This is the classic, no-bean chili sauce that’s served on chili dogs at old-school diners and food carts; rich, tangy, and packed with beefy flavor. In this article, we’ll show you how to make it step by step, share pro tips to nail that perfect texture, and answer all your burning questions. Get ready to elevate your next cookout or family BBQ with the best chili dog sauce ever.
In This Post:
- What Makes This Chili Sauce “Authentic”?
- Ingredients Needed (and Why They Matter)
- How to Make Hot Dog Chili Sauce (Step-by-Step)
- Top 5 Tips for the Best Chili Dog Chili
- Serving Suggestions; Chili Dogs and Beyond
- Frequently Asked Questions (FAQ)
What Makes This Chili Sauce “Authentic”?
A traditional chili dog isn’t topped with your typical hearty chili, it’s topped with a special hot dog chili sauce. An authentic hot dog chili sauce is meat-forward, slightly sweet, and spoonable (more of a sauce than a chunky stew). Here’s how it differs from regular chili:
- No Beans: Unlike bowl chili, the classic hot dog chili sauce has no beans at all. It’s all about the beef and spices, giving it a smooth, fine texture.
- Finer Texture: Authentic recipes cook the ground beef in liquid and mash it as it simmers, so the meat breaks down into very small pieces. This fine, tender meat texture helps the chili sauce sit nicely on a hot dog without a big clump.
- Thinner, “Saucy” Consistency: Hot dog chili is thick but more sauce-like than a chunky chili. It’s meant to smother the dog in a velvety meat sauce, not just sit on top. You should be able to ladle or spoon it over the hot dog so it seeps into the bun a bit.
- Slight Sweetness: Many authentic recipes include a touch of sugar or sweet ketchup. A pinch of brown sugar or ketchup gives that subtle sweetness that characterizes classic drive-in style chili sauce. (Don’t worry; it won’t taste “sweet,” it just balances the spices and tomato tang.)
- Simple Spices: Rather than tons of chunky vegetables or exotic ingredients, this sauce uses basic spices like chili powder, cumin, paprika, onion, and garlic powder. These pantry staples create that signature Coney-Island flavor that chili dog lovers know and love. A splash of Worcestershire sauce and mustard often adds depth and zing.
In short, authentic hot dog chili sauce is a spiced meat sauce designed specifically for topping hot dogs. It’s the kind that clings to your dog, drips just a little into the bun, and makes you want to lick your fingers after each bite!
Ingredients Needed (and Why They Matter)
Let’s break down the ingredients for our chili sauce and what each does. This recipe keeps it simple with common items; you might have everything you need in your kitchen.
Main Ingredients:
- Ground Beef (1 lb): The star of the show. Use lean ground beef (about 90% lean) for less grease and a finer texture. Lean beef means you won’t have to drain fat (which can wash away flavor). If you only have higher-fat beef, you can drain some grease after browning, but lean is best for authentic chili sauce texture.
- Water (2–3 cups): Yes, water! Simmering the beef in water for a long time is the secret to that ultra-fine, tender meat. It allows you to crumble the beef really small and the long simmer melds the flavors. We’ll add enough water to cover the meat while cooking (about 2 to 3 cups) and then reduce it.
- Tomato Sauce (5 oz) and Ketchup (1 cup): These form the tomato base. Tomato sauce gives a rich body, while ketchup adds sweetness and vinegar. Ketchup is a classic ingredient in hot dog chili, contributing both tomato flavor and a hint of sweetness.
- Brown Sugar (1/4 cup): Just a little brown sugar balances the acidity of tomatoes and boosts the sweetness from the ketchup. Authentic recipes often have that touch of sweetness that makes the chili sauce slightly addictive. As one source notes, a bit of brown sugar gives subtle sweetness that rounds out the sauce .
- Worcestershire Sauce (1/4 cup): This fermented sauce brings savory depth and tang. It’s a powerhouse of umami (savory flavor) that makes the chili taste like it simmered for hours. Worcestershire, combined with the beef, gives a slight “meaty” tang that screams old-fashioned chili sauce. (If you don’t have this, soy sauce in a pinch can add some savory saltiness, but Worcestershire is recommended.)
- Dried Minced Onion (1 Tbsp) or Onion Powder: We use dried minced onion for convenience and texture (it will soften during cooking). It gives onion flavor without any chunks. You can substitute 1 teaspoon of onion powder.
- Garlic Powder (1 Tbsp): Adds an aromatic garlic flavor throughout the sauce. Using powder (instead of fresh garlic) ensures the flavor is evenly distributed.
- Chili Powder (1 tsp): The primary seasoning for chili. Chili powder is a blend of spices (including ground chiles, cumin, and garlic) that instantly gives a chili sauce vibe. We use a teaspoon for a mild chili flavor; feel free to increase if you like more heat.
- Paprika (1 tsp): Paprika adds a mild pepper sweetness and deepens the red color. Some authentic Southern recipes use sweet paprika for color and flavor without heat. (If you want smokiness, you could try half-smoked paprika.)
- Cumin (1 tsp): Brings a warm, earthy note that’s common in chili. Even in this simple sauce, cumin makes it taste like “real chili”. Just 1 teaspoon is enough to enrich the flavor subtly.
- Kosher Salt (1 tsp) and Black Pepper (1 tsp): Basic seasoning to enhance all the flavors. Salt is crucial for bringing out the savory taste of the beef and spices. Black pepper adds a little sharp heat.
- Pinch of Red Pepper Flakes: Optional, but a pinch of crushed red pepper adds a tiny kick. Authentic chili sauce isn’t usually very spicy-hot (it’s often kid-friendly mild), so just a pinch will do. Add more if you like heat.
- Yellow Mustard (1 Tbsp); Optional: Not in every recipe, but some folks add a squirt of yellow mustard for a tangy Carolina-style kick. Mustard’s vinegar and turmeric can brighten the flavor (our recipe includes vinegar via ketchup and Worcestershire, but you can add mustard too for that classic zesty note.
All these ingredients work together to create a chili sauce that’s thick, tangy, slightly sweet, and loaded with beefy flavor. Here’s a quick overview in a table:
| Ingredient | Amount | Purpose in Chili Sauce |
| Ground beef (lean) | 1 lb | Meaty base; lean beef for fine texture & no grease |
| Chili powder | 1 tsp | Chili flavor, mild heat |
| Paprika | 1 tsp | Sweet pepper flavor, color |
| Cumin | 1 tsp | Warm, earthy depth (classic chili taste) |
| Kosher salt | 1 tsp | Enhances all flavors |
| Black pepper | 1 tsp | Light heat, seasoning |
| Dried minced onion | 1 Tbsp | Onion flavor without chunks |
| Garlic powder | 1 Tbsp | Savory garlic flavor throughout |
| Red pepper flakes | Pinch (to taste) | (Optional) Touch of heat |
| Water | ~2–3 cups | Simmering liquid to break down beef (will reduce) |
| Tomato sauce | 5 oz (small can) | Tomato base for body and flavor |
| Ketchup | 1 cup | Tomato with vinegar & sweetness (signature taste) |
| Brown sugar | 1/4 cup | Subtle sweetness, balances tang |
| Worcestershire sauce | 1/4 cup | Umami depth and tangy flavor boost |
Note: If you taste the sauce and find you want it sweeter, you can add a bit more sugar or ketchup. If you want more tang, a teaspoon of mustard or a splash of vinegar can be added. This recipe as given hits that perfect balance of sweet-savory-tangy that defines authentic chili dog sauce.
How to Make Hot Dog Chili Sauce (Step-by-Step)
Making this authentic chili dog sauce is easier than you might think; it just takes a little time for the flavors to develop. The hands-on steps are quick, and then the sauce simmers to perfection. Grab a pot and let’s cook!
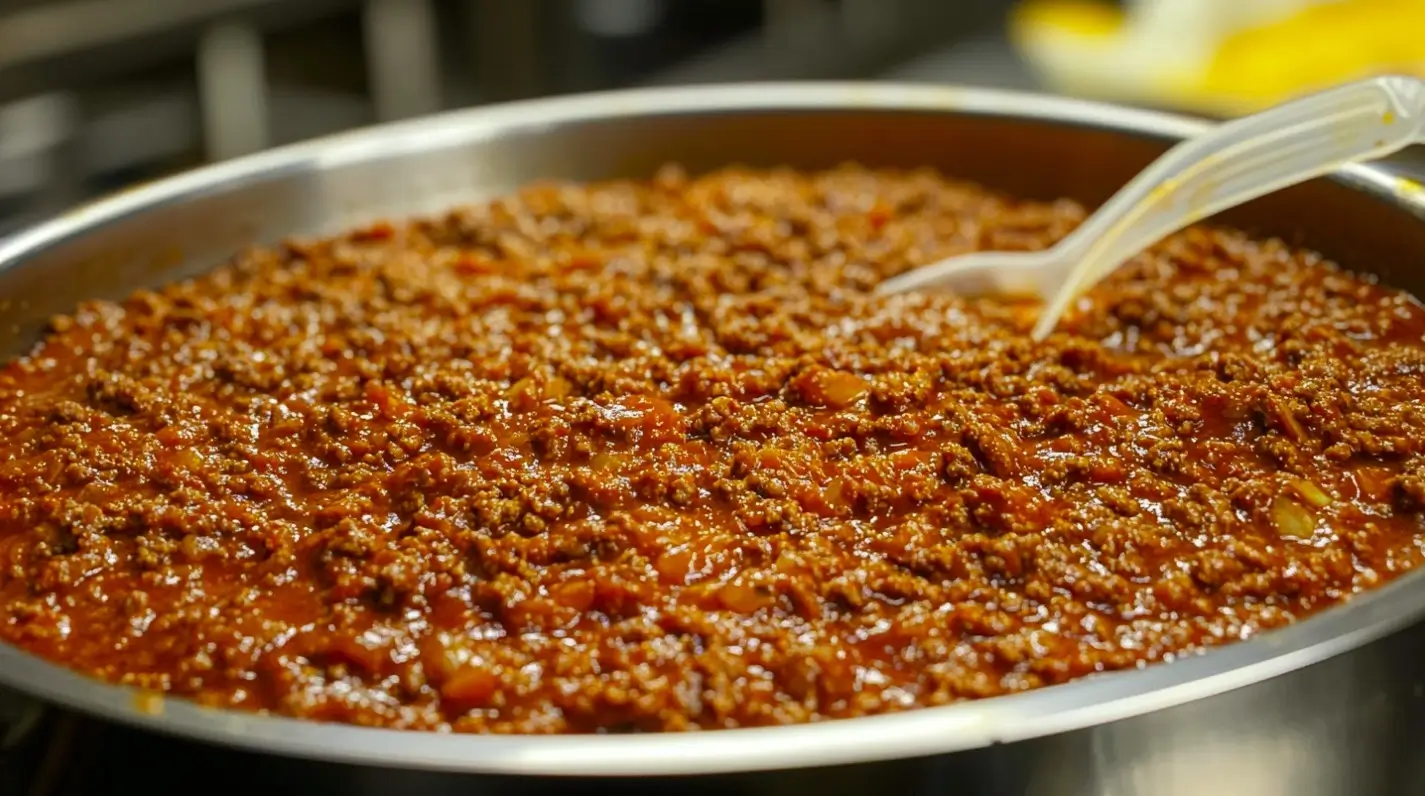
Step 1: Brown the Beef (in Water!)
In a large pot or deep skillet, add the ground beef and enough water to cover it (about 2 cups to start). Bring to a simmer over medium heat. As the beef cooks, use a wooden spoon or potato masher to continuously break the meat into tiny pieces.
Cooking the beef in water helps it crumble very fine; this is key for that smooth chili sauce. Simmer and stir until the beef is fully browned and no pink remains. (It will look like a soupy mixture; that’s okay!) If any excess foam or scum rises, you can skim it off. Do not drain the water or fat; we want all that flavor to stay.
Step 2: Add Spices and Seasonings
Once the beef is browned and crumbled, add in all the dry spices and seasonings: chili powder, paprika, cumin, kosher salt, black pepper, dried minced onion, garlic powder, and red pepper flakes. Stir them into the beef-water mixture. This allows the spices to bloom and infuse the meat. The mixture will start smelling like chili! Also, stir in the tomato sauce at this stage. (We’ll add ketchup and other sweet ingredients later.) Bring it back to a gentle boil.
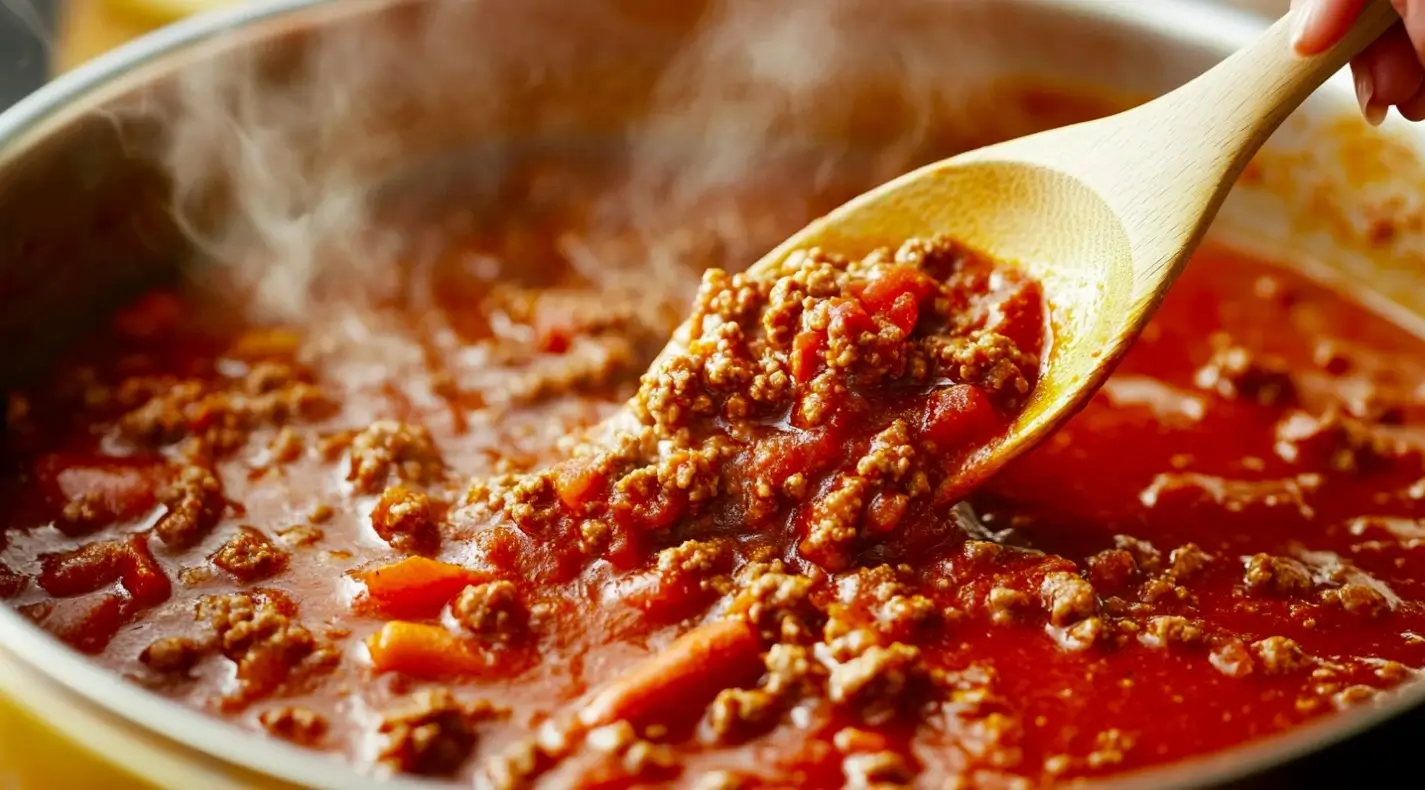
Step 3: Simmer Low and Slow
Reduce the heat to low so that the chili sauce is just simmering (small bubbles). Cover the pot and let it simmer for about 1 to 2 hours, stirring occasionally. This long-simmer melds the flavors and further tenderizes the beef. It’s during this time that the liquid will reduce and the sauce will thicken.
If it starts looking too dry or sticking, you can add a bit more water. You want to end up with the beef very fine and the liquid mostly cooked off by the end of this phase. (It should still be loose and saucy, but not watery.) Remember, a great chili dog sauce is slow-cooked for maximum flavor, and your kitchen will smell amazing!
Step 4: Stir in Ketchup, Sugar, and Worcestershire
After an hour or two of simmering, the beef should be ultra-soft. Now stir in 1 cup ketchup, 1/4 cup brown sugar, and 1/4 cup Worcestershire sauce. These sweet and tangy ingredients are added toward the end so their flavors stay bright. Mix well and let the pot simmer for another 30-45 minutes uncovered. This allows the sauce to thicken and the flavors to concentrate. Stir occasionally to prevent sticking, and lower the heat if needed. The chili will darken in color and become rich and fragrant.
- Consistency Check: By the end, the sauce should be thick but spoonable. You should be able to spoon it onto a hot dog and have it mostly stay put, with just a little drip. If it’s too thick/dry, stir in a bit more water. If it’s too thin, let it simmer a bit longer to evaporate more liquid. You can also mash it more if you see any big chunks. The goal: a thick chili sauce that can be poured over a dog like a gravy.
Step 5: Final Taste and Serve
Turn off the heat and taste your chili sauce. This is the time to adjust seasoning. Need a touch more salt or pepper? Want more heat; add a pinch more chili powder or a dash of hot sauce. If you like a bit more tang, a teaspoon of mustard stirred in now is great. Once you’re happy with the taste, it’s ready to serve!
You can use the chili immediately to make chili dogs (see serving suggestions below). If you have time, you can also let it cool and refrigerate it overnight; many folks say chili is even better the next day, because the flavors deepen (and it thickens further in the fridge).
Quick Recipe Recap: Brown beef in water → add spices + tomato sauce and simmer 1-2 hours → stir in ketchup, sugar, Worcestershire → simmer 30-45 more minutes until thick → enjoy!
Top 5 Tips for the Best Chili Dog Chili
To truly nail that authentic hot dog stand flavor, keep these pro tips in mind:
- Cook the Beef in Liquid for Fine Texture: It might seem odd to boil ground beef, but simmering it in water is the secret to a smooth sauce. Breaking the meat up in liquid yields that fine, tender crumble you want. Many old-fashioned recipes (and even school cafeterias) used this method for hot dog chili. Don’t skip it!
- Use Lean Ground Beef: Start with 85-90% lean beef so you don’t have to drain excess grease. This way, all the flavor stays in the pot. Draining can also accidentally pour off your spices. If you do have a lot of fat on top, you can skim a little, but generally lean beef avoids this issue.
- Simmer Low and Slow: Patience pays off. A longer cooking time lets the flavors meld and develop. Two hours simmering may seem long, but this transforms the sauce from “tomatoey” to a deep, beefy chili. Slow cooking = flavor. (You can even make it a day ahead; it gets even better.
- Balance Sweet and Savory: Authentic chili sauce hits a sweet-savory balance. Ketchup and brown sugar provide sweetness, Worcestershire and spices provide savory depth. Taste and adjust to your preference. If it’s too sweet, add a bit more salt, chili powder, or a dash of vinegar. If it’s not sweet enough or tangy enough, add a bit more ketchup or sugar. Aim for that flavor that makes you think of carnivals and ballparks!
- Consistency Matters: The perfect chili dog sauce should smother the hot dog. If it’s too thin, it’ll run off; too thick, and it won’t spread nicely. You want a spoonable, gravy-like consistency. Adjust by adding water to thin or simmering longer to thicken. A little bit of grease on top is okay (flavor!), but it shouldn’t be oily. You can blot excess oil with a paper towel if needed before serving.
By following these tips, your chili sauce will have that authentic flavor that’ll transport you back to your favorite hot dog memories. It truly will rival any hot dog stand chili; maybe even better because you made it at home with love!
Serving Suggestions: Chili Dogs and Beyond
Now for the fun part; serving your delicious chili! The classic way is of course Chili Dogs, but don’t stop there. This authentic hot dog chili sauce is a versatile topping that can jazz up many dishes. Here are some serving ideas:
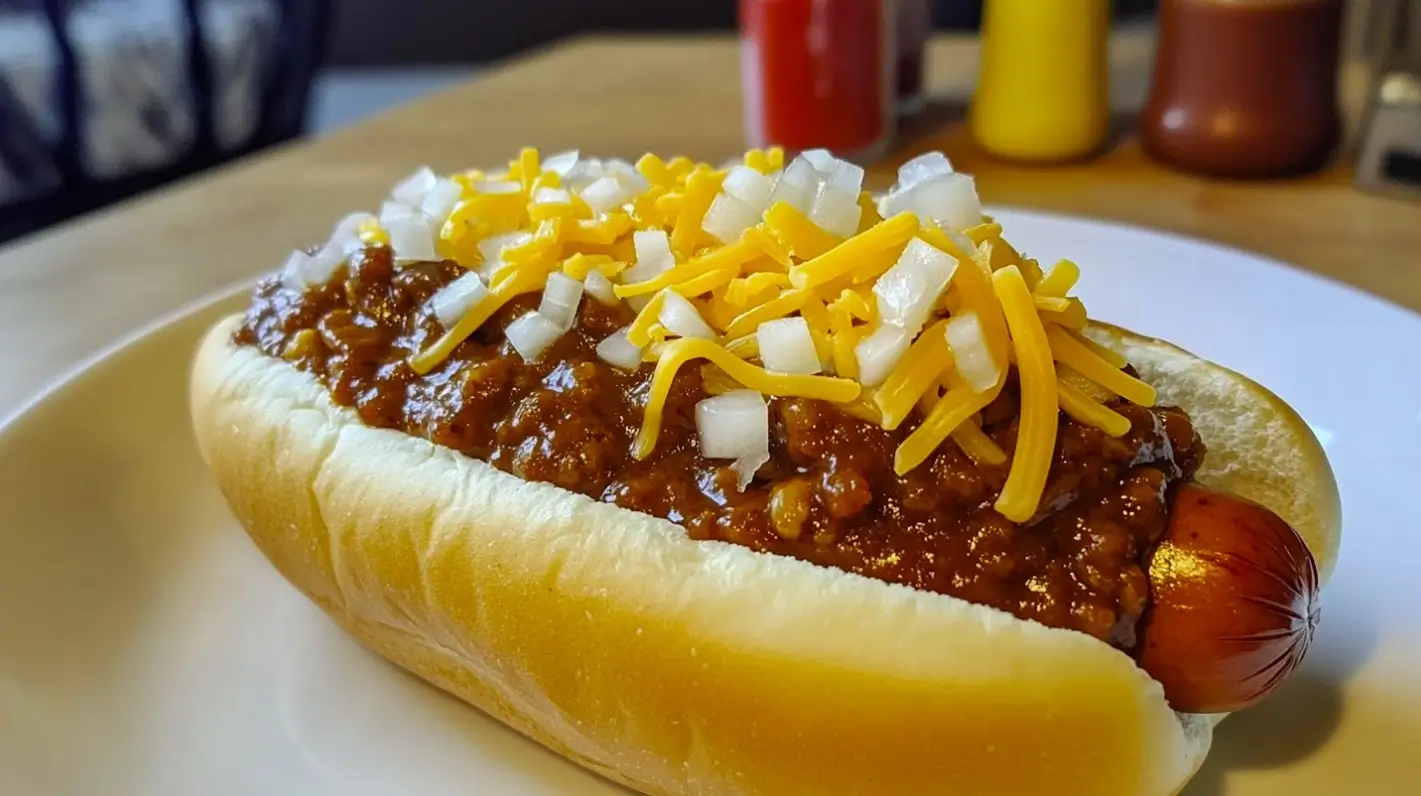
- Classic Chili Dogs: Grill or boil some quality hot dogs, nestle them in soft buns, and spoon generous helpings of chili sauce over each. Top with diced onions and shredded cheddar cheese for the iconic chili dog. A squiggle of yellow mustard on top completes the traditional presentation. (Tip: To assemble without too much mess, put mustard on the dog first, then chili, then cheese and onions. The chili helps the toppings stick.) Enjoy with a fork nearby; it’s delightfully messy!
- West Virginia Style Dogs: Love some slaw? In places like West Virginia and the Carolinas, a true chili dog is topped with chili, coleslaw, and onions (and mustard). Try adding a spoonful of creamy coleslaw on top of your chili dog; the cool, crunchy slaw against the warm savory chili is amazing.
- Chili Cheese Fries: Spoon this hot dog chili over a plate of crispy french fries or tater tots. Sprinkle a generous amount of shredded cheese on top (cheddar or American). You can even pop it under the broiler for a minute to melt the cheese. Grab a fork and dig into chili cheese fries that will make any game day special. (This chili is thick enough to sit on the fries without making them too soggy, especially if the fries are nice and crispy.)
- Chili Burgers: Transform a regular burger into a “chili burger.” Place a cooked beef patty on a bun, add a slice of cheese if you like, then ladle on some chili sauce. It’s like a cross between a sloppy joe and a chili dog; very hearty and flavorful. Have napkins ready!
- Over Rice or Pasta: This chili sauce can double as a quick chili meal; serve it over steamed rice or spaghetti for a fun twist. In some regions, a “chili size” or Coney Island spaghetti is spaghetti topped with hot dog style chili sauce and cheese, similar to Cincinnati chili. Our sauce would work great for that; it’s meaty and spiced just right for pairing with pasta.
- Chili Mac: Stir leftovers into macaroni and cheese to create an easy chili mac casserole. One of the recipe testers in our family even loved mixing this chili sauce into his mac ‘n’ cheese for a quick chili mac lunch. It’s kid-approved comfort food!
- Baked Potato Topping: Got baked potatoes? Top a fluffy baked potato with a big spoon of hot dog chili, then add cheese and sour cream. You’ve got a loaded spud that’s a meal on its own; a great way to use leftover chili sauce on the second day.
- Dip with Chips: Serve this chili warm in a bowl, sprinkle some cheese on top, and use sturdy tortilla chips or corn chips to scoop it up; kind of like a dip. This can be a crowd-pleasing appetizer (think chili cheese dip, but meatier). For a fun party platter, pour the chili over a pile of corn chips and garnish with cheese, chopped jalapeños, and sour cream to make chili nachos.
No matter how you serve it, this chili sauce brings a burst of flavor to anything it touches. Of course, the ultimate is a classic chili dog with all the fixings. Serve your chili dogs with classic sides like potato chips or fries, and perhaps a cool side like coleslaw or a 5-minute cheddar ranch dip for dipping chips Check out our crowd-pleasing Cheddar Ranch Dip to round out your cookout spread!). And to really impress at your barbecue, you might pair those chili dogs with some sticky, fall-off-the-bone Slow Cooker Chicken Drumsticks from our collection for the non-hot-dog eaters, you’ll have something for everyone.
Enjoy experimenting; this authentic chili sauce turns ordinary dishes into something to remember!
Frequently Asked Questions (FAQ)
Q1: What’s the difference between hot dog chili sauce and regular chili?
A: The difference is mainly texture and ingredients. Hot dog chili sauce is a smooth, meat-only sauce (no beans, no large veggie chunks) meant to top a hot dog. It’s usually sweeter and more finely textured than a bowl of chili. Regular chili (chili con carne) is often thicker, chunkier, and can include beans, peppers, tomatoes, etc., eaten as a stew. Think of hot dog chili as a condiment; it’s a spiced meat sauce, whereas regular chili is a hearty meal on its own.
Also, chili sauce often uses ketchup and sugar for sweetness, which most Texas-style chilis don’t. The result: hot dog chili sauce is thinner and slightly sweet, perfect for drizzling, while traditional chili is thicker and savory-spicy.
Q2: Can I make this chili sauce ahead of time?
A: Absolutely; in fact, it might taste even better the next day! Many chili sauces develop deeper flavor after resting overnight. You can make it 1-2 days ahead, let it cool, then store in the fridge. Reheat it gently on the stovetop or in a slow cooker on low when you’re ready to serve. Making it ahead is great for parties; the flavors meld, and you free up cooking time on the event day. Pro tip: If it thickens up too much after refrigeration, just stir in a few tablespoons of water while reheating until it reaches the desired consistency.
Q3: How do I store leftovers and for how long?
A: Store leftover hot dog chili sauce in an airtight container in the refrigerator. It will keep well for up to 3-4 days in the fridge. Make sure to let it cool to room temp before sealing and refrigerating. For longer storage, you can freeze the chili sauce. Place it in freezer-safe containers or zip-top bags (lay the bags flat for easy stacking) and freeze for up to 3 months. Thaw overnight in the fridge before reheating.
When reheating (either on the stovetop over low heat or in the microwave), stir occasionally until hot throughout. The sauce may have thickened in the fridge; add a splash of water if needed to loosen it up. Always reheat to bubbling hot before serving (for food safety and best texture).
Q4: Can I make this recipe in a slow cooker or Crockpot?
A: You can, with some modifications. The best method is the stovetop because you can brown and break up the beef more effectively. However, you could start by browning the beef in a skillet, breaking it up well, then transfer it to a slow cooker with the remaining ingredients. Cook on LOW for 3-4 hours or HIGH for 2 hours. Leave the lid slightly ajar in the last hour to let moisture evaporate so the sauce can thicken.
Keep in mind, you’ll still want to break up the meat as much as possible at the start for that fine texture. Some cooks don’t recommend slow cooker for this because it’s so quick on the stove and you still have to pre-brown the beef. But you can use the Crockpot to keep the chili warm for serving at parties; that works great. After cooking on the stove, transfer the finished chili to a slow cooker on “Keep Warm” so guests can serve themselves right from it.
Q5: How can I adjust the spice level or flavor?
A: This recipe yields a mild, family-friendly chili sauce. To adjust the heat: add more chili powder, more red pepper flakes, or even a dash of hot sauce or cayenne pepper. For a spicier kick, you could sauté a minced jalapeño or a pinch of cayenne with the beef. To make it less spicy (if you accidentally overdid it), add a bit more sugar or ketchup to mellow the heat, or serve with dairy (like cheese or a dollop of sour cream on your dog) to cool it.
To tweak the flavor balance: if you want it more tangy, increase the mustard or vinegar (Worcestershire has vinegar, as does ketchup, but you can add a teaspoon of apple cider vinegar for extra tang). If you want it smokier, try a little smoked paprika or even a dash of BBQ sauce. And if you prefer a less sweet sauce, you can reduce the brown sugar. This recipe is pretty forgiving; feel free to play around to suit your taste buds.
Q6: Can I use a different meat or make it vegetarian?
A: Yes, you can vary the protein. Ground turkey or ground chicken can be used instead of beef; just know the flavor will be a bit lighter. Turkey, especially, is a common swap and will still give you a tasty chili sauce (you might add a splash of oil when browning turkey since it’s lean and add a bit more Worcestershire or even a beef bouillon cube for extra savory flavor). For a vegetarian version, you could use plant-based ground “meat” crumbles.
Many plant-based meat substitutes will crumble and simmer similarly to beef. Another option is to use finely chopped mushrooms and walnuts as a base (for a whole-food approach), but that would change the texture significantly. If using a meat alternative, you might need to shorten the simmer time (since there’s no fat to render or tough fibers to break down). Also, check if your meat substitute is already seasoned and adjust spices accordingly. No matter the protein, keep the rest of the ingredients the same to maintain that authentic sauce flavor.
Q7: Is this chili sauce the same as Coney Island chili?
A: Pretty much, yes! Coney Island chili sauce refers to the style of meat sauce famously served on hot dogs (originating from early 20th-century hot dog stands). It’s essentially what we’re making a fine-ground, beanless chili for hot dogs. Different regions have slight variations (for example, Detroit and Michigan coney sauces might have a bit of clove or allspice in their spice mix, and Cincinnati chili; used on coneys, has warm spices like cinnamon or cocoa).
This recipe sticks to a basic Southern-style chili dog sauce (no unusual spices) which is very similar to most Coney-style sauces. If you’re looking for that ballpark or diner chili dog experience, this recipe will deliver it. You can call it hot dog chili, Coney Island chili, chili dog sauce, it’s all referring to this yummy meat topping. Enjoy, and feel free to tell everyone you have the “secret recipe” for the best chili dogs in town!
Now you’re all set to make the ultimate chili dog at home. With this authentic hot dog chili sauce simmering on your stove, don’t be surprised if the amazing aroma brings the family running to the kitchen. It’s time to toast some buns, grill up those franks, and load up on chili and toppings. One bite of your chili dog with this flavorful sauce, and you’ll be taken right to the county fair or your favorite childhood diner. Enjoy your homemade chili dogs, and happy cooking!
7 Irresistible Reasons to Make Creamy Lemon Chicken Pasta
Low-Calorie Greek Yogurt Brownies That Taste Incredible
Caesar Salad Dressing | 7 Irresistible Reasons to Love It
Smoky Grilled Chicken with Alabama White Sauce